When I was looking to purchase my first Z3 a couple months ago, I saw one for sale that had glowing light eminating from it's gills. I thought that was really a cool look and I considered it for my car when I would finally get it.
It didn't take long to buy the car, and start ordering "mods" for it. Just today I finished installing the lighted gills, and I have to thank others who've done this before me, for providing the know-how. I found that I had to look over several websites and discussion boards to collect all the information needed to make it happen, and I thought it would be convenient to have it all put together, with photos, to help others that might want to do this mod.
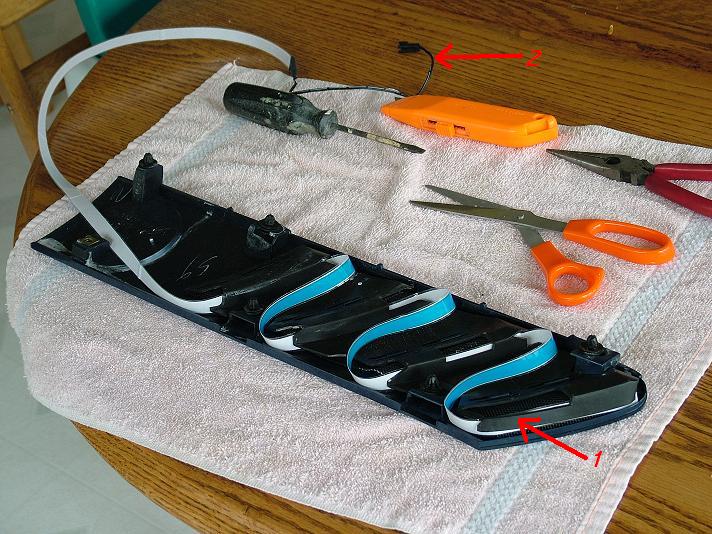
The Tools and Supplies I Used:
~ (2) 5 ft. length "Mutant Mods EL tape strip" (1/2" width) with 12 V inverter
~ extra 5 ft. 22 guage wire (sheathed pair)
~ soldering iron and solder
~ wire cutter/stripper tool
~ phillips and standard screwdrivers
~ exacto knife (aka boxcutter)
~ needle-nosed pliers
~ double-sided adhesive tape
~ electrical tape
I had most of these tools already, but I had to purchase the glow strips, soldering iron, and solder, and their combined cost was only about $40. I purchased the glow strips from Shentech.com . There were wide price differences for the strips from one company to the next, and this company was much better priced than others.
The whole project took roughly 3 hours. Others who have done this before have used slightly different methods and materials, but here is a step by step guide for how I did mine:
Removing the Gills:
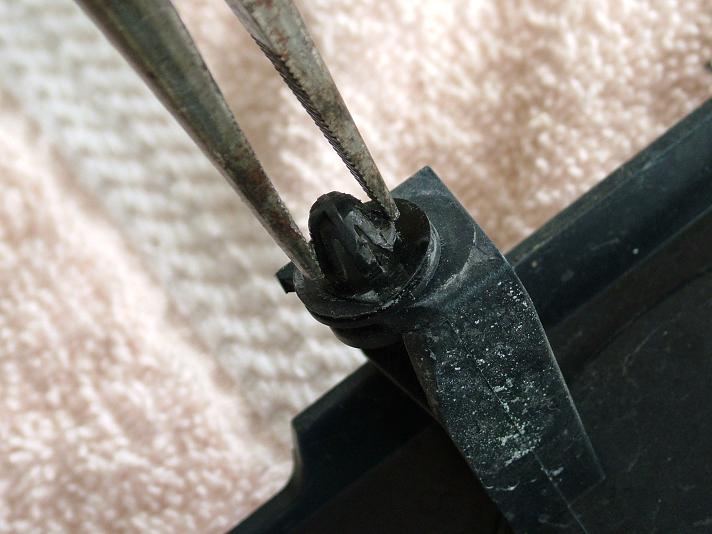
Lift your hood and inspect the inside surface where the gills are located. you'll notice that the gills are attached to the hood by five "snaps" and one screw. You'll need to use the needle-nosed pliers to pinch the snaps and allow them to slip out of their openings. pinch with the pliers in the orientation shown and apply a little pressure toward the outside of the car. Then unscrew the screw, being careful not to drop the gill.
Preparing the Gills:
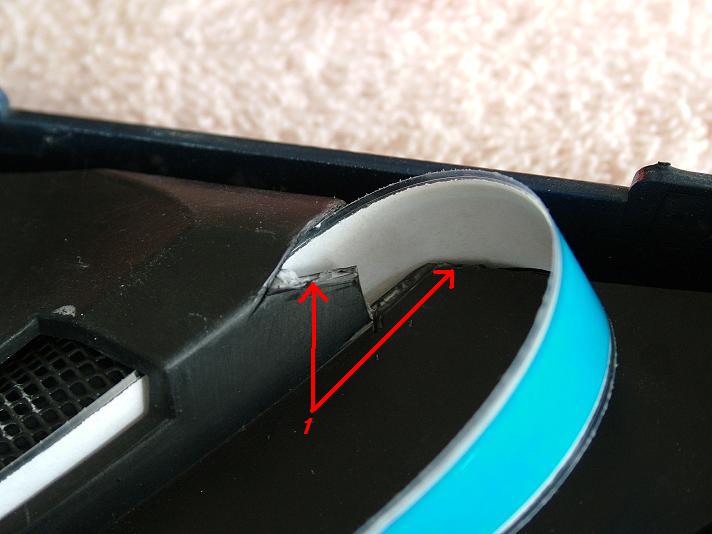
Place the gill on a clean workspace on a towel to keep from scratching it. Looking at the inside surface of the gill, you'll notice it is made up of three layers. There is a black plastic backing, a screen, and the outer shell. Carefully remove the black plastic backing by using a standard screwdriver to bend the plastic that surrounds the hooks, just enough to release them. You will then need to use sharp scissors or a boxcutter to cut away some of the black backing so the glow strip can curl through without crimping too much (figure 1 below). A damaged strip won't work, so you'll need to allow for more gentle bends.
Threading the Glow Tape:
Once the black backing has been cut properly, you'll start to thread the strip through. The end of the strip without the wire will go into the front of the gill as shown below (figure 1). Remember to face the glowing side of the strip toward the gill opening. As you start to thread the strip through, snap the backing in place one section at a time, until the gill is reassembled. It should look similar to the photo below, with the wire end dangling toward the rear of the gill (figure 2).
Reinstalling the Gills:
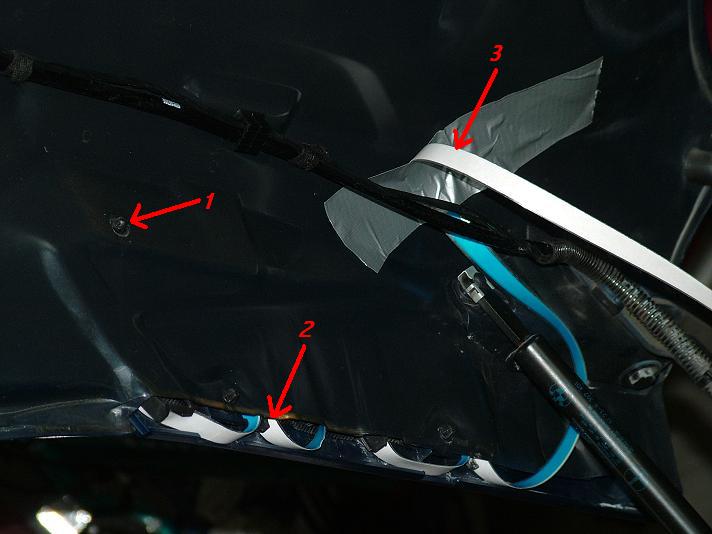
Carefully take the gill back to the car and place it up against the hood, looking for the alignment of the snaps with their holes (figure 1). Gently press the gill inward until you hear the snaps engaging, but making sure the strip is not crimped (figure 2). Screw the screw back in place and check the gill's stability. Thread the strip between the hood-lift and other electrical components as shown and secure with tape(figure 3).
Electrical Connections:
next, connect your inverter to the glow strip wires, and solder extra lengths of wire as needed to reach the electrical supply you plan on tapping in to. I chose to tap in to the parking light wiring on the driver's side, since the parking lights are always on when the headlamps are on, and the wiring is easily accessible.
Unplug the power to the parking lamp (figure 4). Carefully strip away a few inches of the plastic sheathing that surrounds the three wires (figure 5). Use the wire cutter/stripper tool to cut the white wire and brown wire (leave the blue wire intact, we won't use it). Strip 1/4" of sheathing from each end of both wires. Solder both white wires together with the + wire from the inverter (in my case it was yellow--your color may differ). Solder both brown wires together with the - or ground wire from the inverter (mine was black--your color may differ). You may need a helper for those last soldering steps--my wife held the wires while I soldered them. Use electrical tape to protect the soldered and exposed areas (figures 2 and 3). Use double-sided tape to secure the inverter (figure 1) to a plastic part within the engine compartment (I figured any plastic part isn't going to get that hot). Secure other wires with duct tape as needed, paying attention to how the hood will close over them.
Test your new mod by turning on the parking lights. If it was done correctly, it'll work!
Considerations:
~ is this "street legal" in your state? It appears to be legal in mine (PA Vehicle Code).
~ my 2001 z3 3.0i may have a different electrical layout than your z3.
~ at this time I don't know how inclement weather could affect the integrity of the system.
~ integrity of the wiring may be affected by contact with hot engine components.
~ I don't know how long the lights will perform at peak intensity, or how quickly a drop-off
 in intensity could take place.
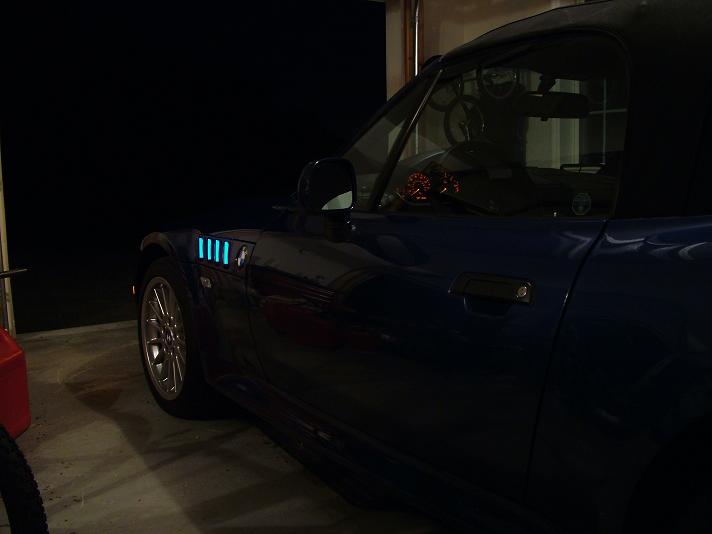
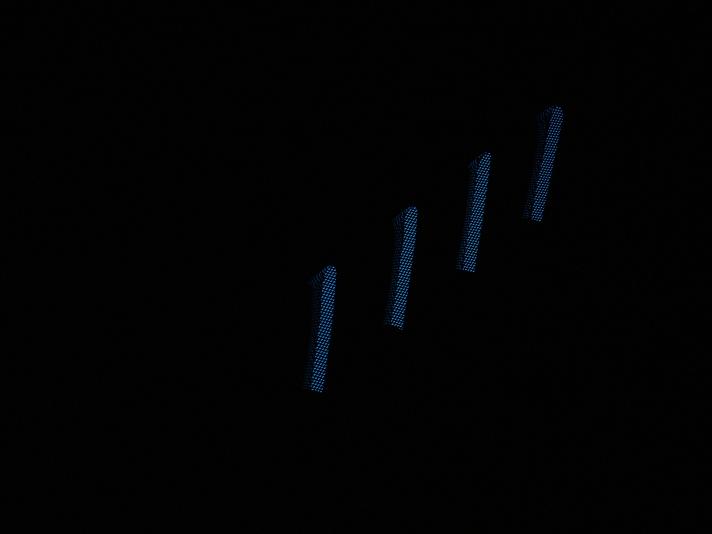
~ I expect the glow effect to be more pronounced on a lighter colored car, where the whole
gill area reflects the light from the strip. On a darker car like mine (topaz blue), the gills
are lit, but there is not much refection off the surrounding gill surface itself.
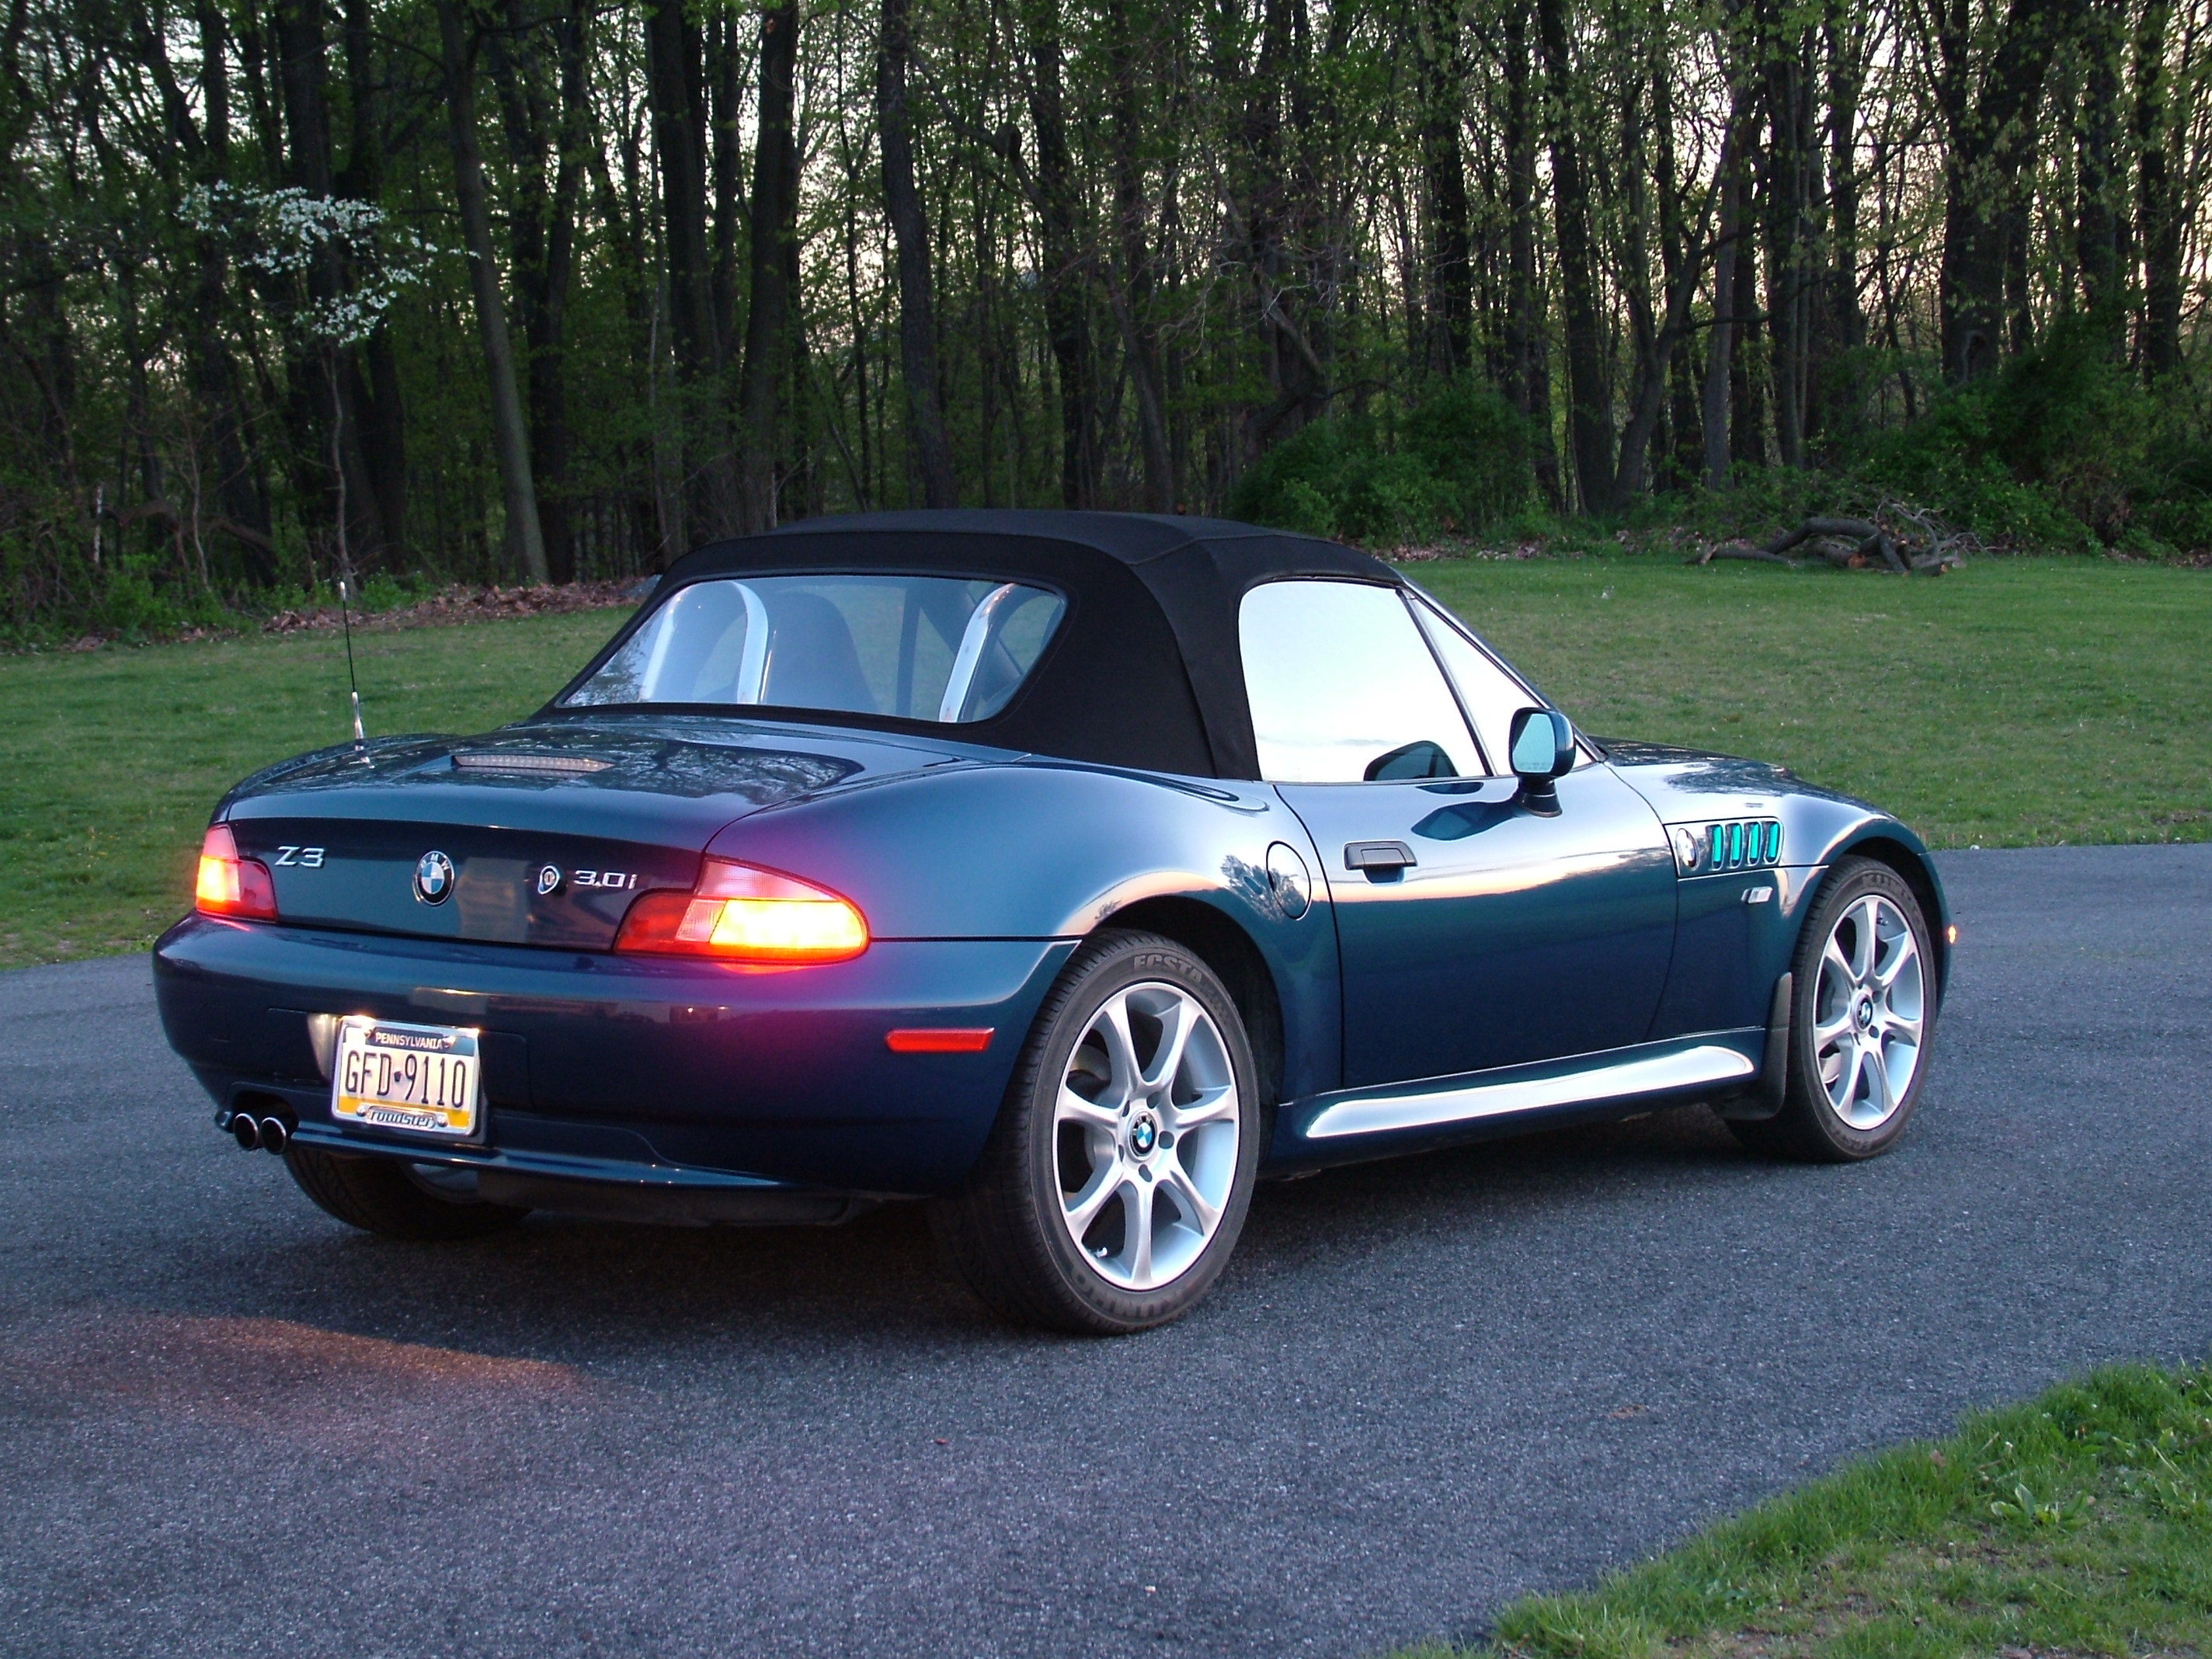
My Final Results:
I hope you are as happy with your results as I am with mine. I plan on periodically updating this page, as developments, good or bad, occur. Please return to the forum that referred you here, and reply to my post with your thoughts or your results on this project.
~Cngizbleevng
10/13/2005 Rain has not had any ill effects on the glow strips, even though the strips are exposed to the elements.
11/03/2005 If there is difficulty viewing this site due to browser issues (ie, photos covering up some of the text), you can
click here to visit my webpage without photos.
11/03/2005 Several posters on BMW message boards have said that "mutant mods" EL tape has now been discontinued.
There are other manufacturers of similar products that should still be available.
12/29/2005 Cold weather has had no ill effects on the strips. No change in light output occurs with temperature changes.
07/05/2006 According to another person who's done this mod, strips similar to those I used are available at
www.beingseen.com/flatlite.html
11/20/2006 The light strips suddenly stopped working. With a little checking, I found that the inverter had gone bad. It
was simple to replace and everything is working well now.